Introduction
There are many ways to create presentations with R Markdown. The package xaringan build by Rstudio employee Yihui Xie is one possiblity to create impressionable HTML5 slides that really stand out. It’s beautiful layout and concise and tidy coding structure makes it a charm to work with. It’s build on the remark.js library and if you want to learn more about it you can do this here. Here are some example slides by the creator which also serves as an introduction:
https://slides.yihui.name/xaringan/
Are you ready to become a presentation ninja?
Installation
There is multiple ways to install packages in R. One safe bet is to install the xaringan package from CRAN, as follows:
install.packages("xaringan")
Sometimes the versions on CRAN are somewhat older. If you are interested in the newest version, one option is to always look for the related (GitHub) repository. To install it from here you need to first install the devtools package in case you don’t have it and then use install_github(“yihui/xaringan”) to install the package from GitHub.
## only install devtools if needed ##
#install.packages(devtools)

devtools::install_github('yihui/xaringan')
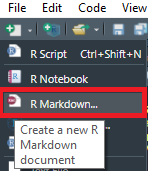
To create a xaringan presentation, you create an R Markdown document with the xaringan::moon_reader output format. From within RStudio, it is easy to get started. First click on the New File icon below File and then on R Markdown:
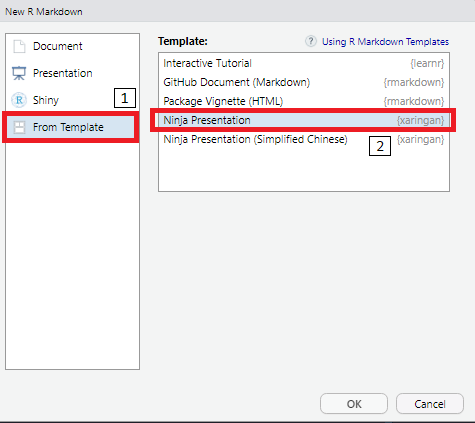
Next select “From Template” then Ninja Presentation, and you will see an R Markdown example.
Press the Knit button to compile it.
Basics
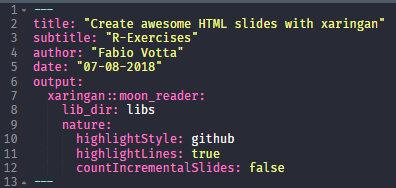
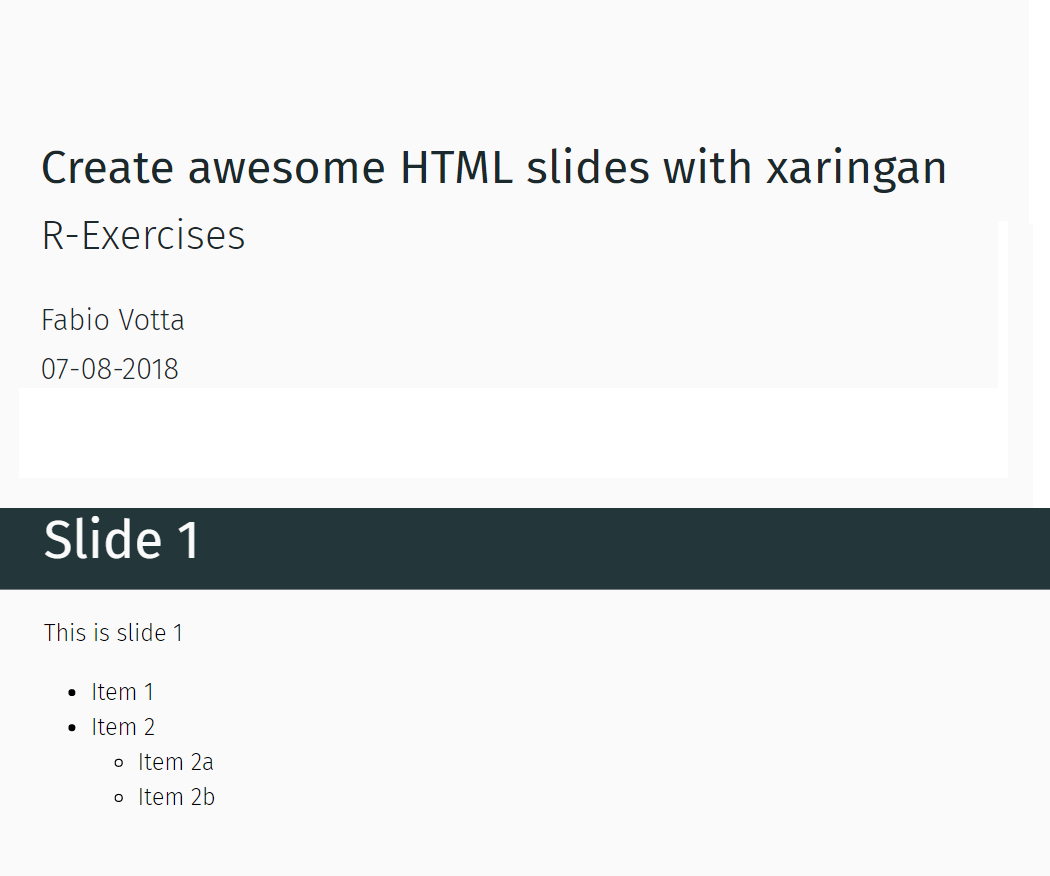
As is the norm with any R Markdown document, there is a yaml header at the beginning which specifies some meta data. Here you can put in the title of the presentation, authors and more. This will configure the title slide. Much more can be done here to customize how your slides will look like but for now we stick with the basics. Here is how your yaml header could look like:
This gives us the following title slide:

So how are slides created with xaringan? Easy!
Overall, regular R Markdown rules apply so you can use this for italic and two stars for bold for example or even your most complicated LaTeX equations.
The # before a line of text creates a header for the slide and the more hashtags you add the smaller is the header
Slides are then seperated with three lines ---. For the first slide you don’t need to do this because it is already implied after the yaml header.
If we wanted to let elements on the slides appear with a click, we seperate them with two lines -- like this.
Lastly, if we want to have more space between the elements on a slide we can use the html tag <br>.
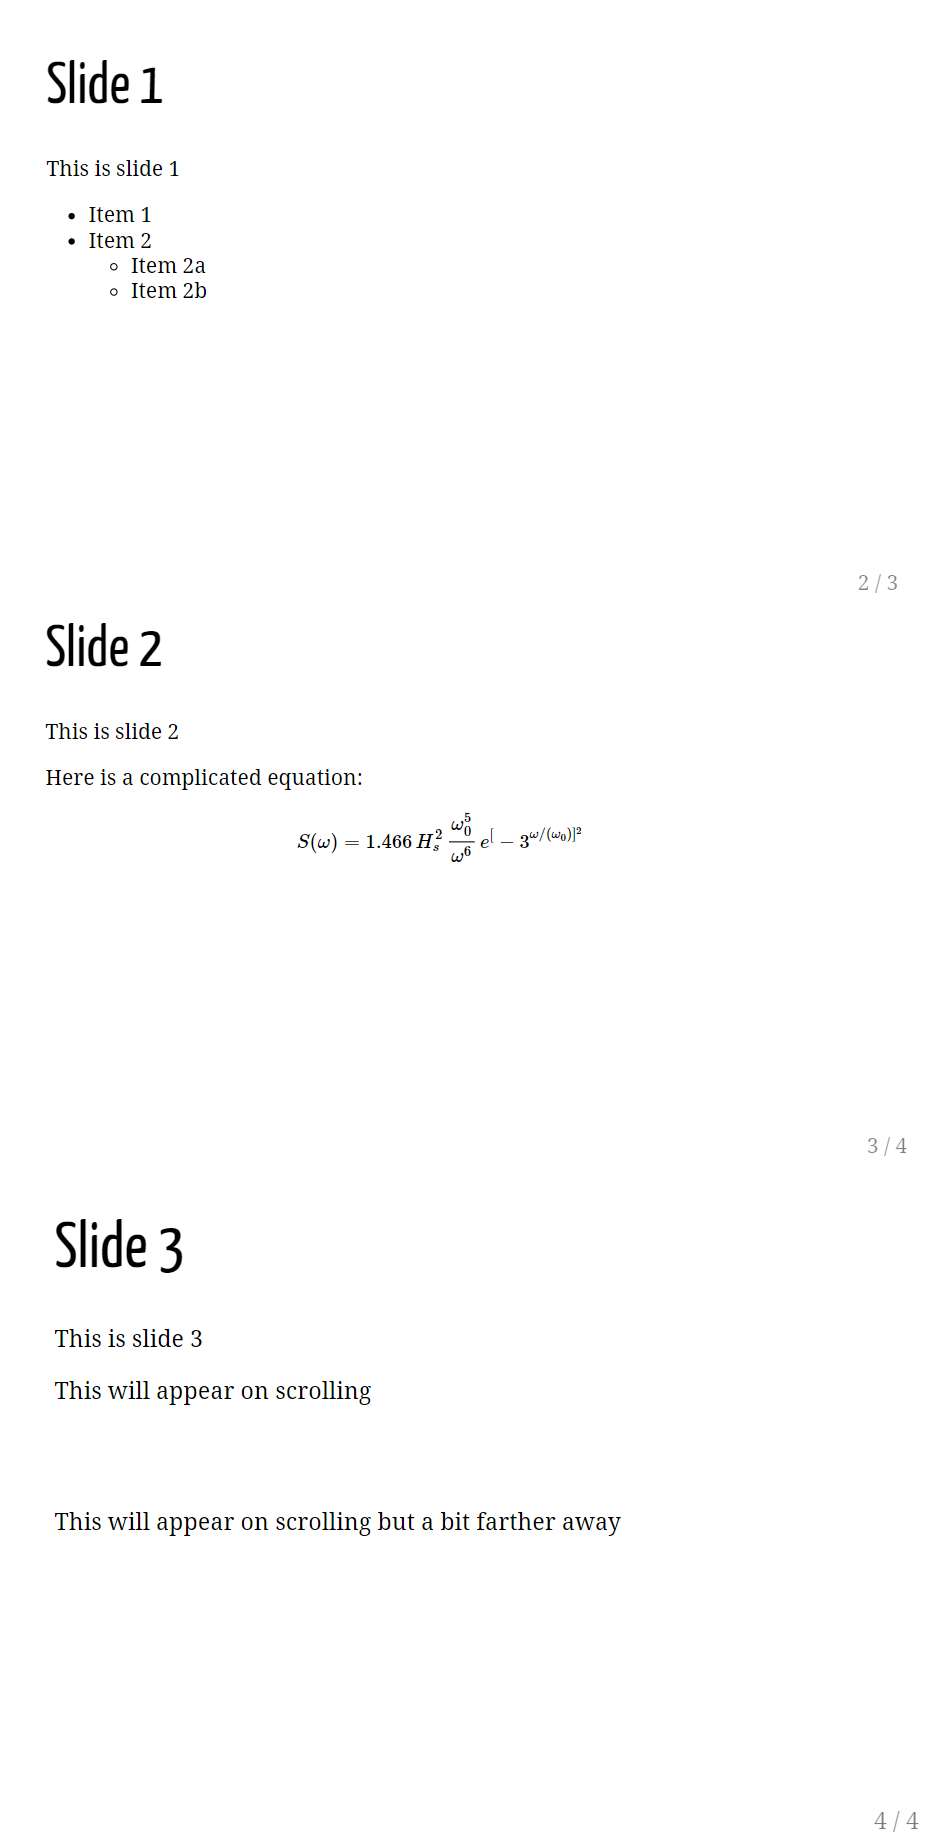
You could start with something like this:
# Slide 1

This is slide 1

* Item 1
* Item 2
    + Item 2a
    + Item 2b


---

# Slide 2

This is slide 2

Here is a complicated equation:

$$S (ω)=1.466\, H_s^2 \,  \frac{ω_0^5}{ω^6 }  \, e^[-3^ { ω/(ω_0  )]^2}$$

---

# Slide 3

This is slide 3

--

This will appear on click

--

<br>
<br>

This will appear on click but a bit farther away
This is how this would look like:
This looks awesome already!
Formatting Slides
Let’s say we want to play around a bit with the format of our slides. There are some build in functions that lets us do exactly that.
We specify the following code at the beginning of a slide:
class: inverse, center, middle
This will inverse the color (here: black) center the elements horizontally (center) and vertically (middle) on that slide. This makes for some pretty cool transition slides.
Here is an example:
---

class: inverse, center, middle

# Statistical Analysis
Which produces the following slide:
![]()
Adding a GIF or an Image
You can also add GIFs or images to your slides. It’s done exactly in the same way as you would with a normal R Markdown document. Here is an example:
---
class: inverse, center, middle


using themes and xaringanthemer
We’ve already come a long way creating nice xaringan slides. If we wanted to customize the theme of the presentation, xaringan comes with some build-in color schemes that you can try out.
Here is one of them. Just add the following line in your YAML header and you are good to go:
output:
  xaringan::moon_reader:
    css: [metropolis]
This looks like this:
Here is a list of themes:
- metropolis
- hygge
- rladies
If you want to create your own themes I can recommend the xaringanthemer package:
https://github.com/gadenbuie/xaringanthemer
Exporting the presentation to .pdf
The output format of xaringan is html. However, if you want a .pdf file you could just simply open the slides in your favorite web browser and print them to .pdf. This seems to be the easiest version to do it.
What Now?
I hope you enjoyed this little tutorial!
Here are some more examples of beautiful xaringan slides that can serve as your inspiration:
https://github.com/favstats/xaringan_slides/
You want to add animated transitions? Well, here’s an implementation of that:
https://www.garrickadenbuie.com/blog/2018/12/03/animate-xaringan-slide-transitions/
Lastly, a wiki helps to implement more advanced options. Be sure to check it out at some point: